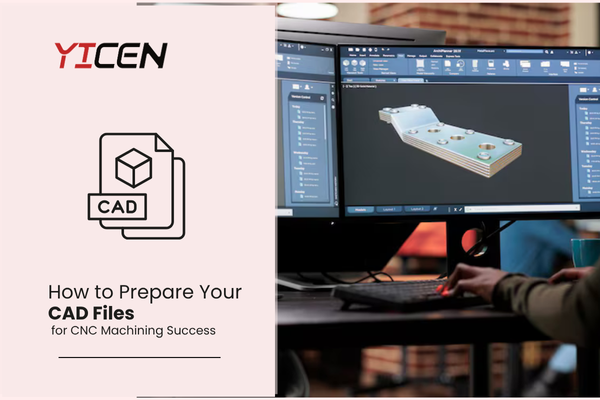
Preparing your CAD files properly is one of the most important steps in achieving accurate and cost-effective custom CNC machining (CAD Files for CNC Machining). The way you organize and format your files will have a direct effect on the quality, lead time, and cost of the final product, whether you’re making one prototype or a lot of CNC machining parts. This guide will show you the best ways to get your CAD files ready so that you can get the most out of CNC machining services. We’ll talk about everything from file types to design tolerances, and of course, we’ll use important terms like precision CNC machining, CNC prototype machining, and others.
Why CAD File Preparation Matters in Custom CNC Machining
If CAD files aren’t set up correctly, they can cause mistakes, delays, and higher costs. A report from Engineering.com in 2023 says that more than 35% of manufacturing mistakes are caused by problems with design files, such as missing tolerances, unclear dimensions, or wrong material callouts.
To get good results with custom CNC machining, you need to give machine operators and programmers CAD files that are clear, complete, and accurate so they can quickly understand and carry out your design without any confusion.
Understanding the Role of CAD Files for CNC Machining
What Is a CAD File?
A CAD file is a digital version of your part design. These files have the geometry, dimensions, material specifications, and tolerances that are needed for making things. The CAD file is used to make toolpaths that tell the CNC machining center what to do. That’s Why CAD Files for CNC Machining is really helpful.
How CAD Files Integrate With CAM
CAD files are put into CAM (Computer-Aided Manufacturing) software, which makes G-code that tells the CNC machining center what to do. A clean and well-organized CAD model makes sure that the machine can cut accurately with little help from people.
Best Practices to Prepare CAD Files for CNC Machining
1. Use Standard File Formats
Most CNC machining services will accept the following file types:
- STEP (.stp/.step) is the best format for 3D models.
- IGES (.igs/.iges) – Also very common
- DXF (.dxf) is a common file type for 2D profiles.
- STL (.stl) is okay for milling, but not the best because of the mesh data.
Always ask your custom CNC machining services provider what formats they like best.
2. Remove Unnecessary Features
Text, logos, and cosmetic features are some design elements that can make machining more difficult. To clean your files, take out:
- Logos that aren’t meant to be engraved
- Threads (unless they are needed for machining)
- Reference geometry that isn’t used
Precision CNC machining centers can keep tighter tolerances when things are less complicated.
3. Define Clear Tolerances
Only use tolerances when they are needed. Over-tolerancing can make machining take longer and cost more.
- Use ±0.005″ (±0.127 mm) as a general rule for standard tolerances.
- Only tighten tolerances on important dimensions
- Putting a general tolerance note on your drawing can speed things up.
4. Call Out Critical Dimensions
Make sure your CAD drawing or 2D print includes:
- Hole sizes and depths
- Thread callouts
- Flatness, roundness, and concentricity, if needed
- Material type (e.g., Aluminum 6061, Delrin, etc.)
This helps the CAD file for CNC machining operator prioritize key features in your part.
5. Confirm Units and Scale
Make sure your CAD software is set to the right unit system (inches or millimeters) and check that your model is at a 1:1 scale. A common reason for quoting mistakes and production delays is using the wrong units.
6. Avoid Sharp Internal Corners
CNC machining tools are round, so they can’t make sharp corners inside. Instead:
- Add fillets or curves
- Use an internal radius that is at least as big as the tool radius.
- Think about how easy it will be to machine when you design it.
If you do this, you won’t have to use EDM or any other secondary processes.
CAD Design Tips for Prototype CNC Machining
If you’re creating a one-off part for CNC prototype machining, keep things simple to save time and money:
- Only use tight tolerances on features that need them.
- Use standard sizes for stocks
- Pick common materials like nylon or aluminum.
- Make sure your design can be made on a CNC machining center.
Prototyping is a process that happens over and over again. Optimizing your file can make changes go faster.
Common Mistakes to Avoid
Not Supplying a 2D Drawing
A 2D drawing can help make things clearer, even with a perfect 3D model:
- Important measurements
- Finishes on the surface
- Thread specs
- How to put it together
Along with your 3D file, include a clear PDF.
Missing Threads or Fastener Details
If your design has tapped holes or certain fasteners,
- Make sure to mark the size and depth of the threads.
- Types of holes (through or blind)
- Specifications for countersink or counterbore
Using Non-Manufacturable Geometry
Designs made for 3D printing often include features that are not practical for custom CNC machining. Avoid:
- Deep pockets with small radii
- Extremely thin walls
- Tiny fillets that require micro tools
Work within the capabilities of CNC machining services to keep costs low.
How to Work with Your CNC Machining Partner
It’s important to talk to your custom CNC machining vendor clearly. This is what you need to give:
- CAD file in the right way
- 2D drawing with notes on tolerances and materials
- Required amount and time frame
- Any needs for post-processing (anodizing, polishing, etc.)
Talk to your vendor about what their equipment can do. Some CNC machines may be better for 3-axis or 5-axis work, depending on how complicated the part is.
Checklist : CAD Files for CNC Machining
Here’s a quick checklist before submitting your files:
- Use the STEP or IGES file type
- Include a 2D drawing with important measurements
- Set general and important tolerances
- Check the orientation of the units and parts
- Get rid of features that can’t be machined
- Stay away from sharp corners on the inside
- Call out tapped holes and threads
- Use geometry that can be made
Conclusion
If you prepare your CAD files for CNC Machining correctly, you can save time, money, and trouble during the custom CNC machining process. If you follow these best practices and work closely with your machining provider, you’ll make better parts and speed up production cycles.
Whether you need just one CNC prototype machining part or a full set of CNC machining services, it’s important to prepare your files carefully.
FAQs: Preparing CAD Files for CNC Machining
Q1: What file type works best for CNC machining?
A: Most CNC machining services accept and prefer STEP (.stp) files because they work with a lot of different CAM software.
Q2: Should I send a 2D drawing with my CAD file?
A: Yes. A 2D drawing makes it easier to see tolerances, threads, and other important dimensions that aren’t always clear in a 3D model.
Q3: How strict should my tolerances be?
A: Use the standard ±0.005″ unless you really need tighter tolerances. Too much tolerance can make machining more expensive and complicated.
Q4: Is it possible to send an STL file for CNC machining?
A: STL files are okay, but not the best, especially for milling. They don’t have exact measurements and are based on a mesh, which can make them less accurate.
Q5: What can I do to make it easier to machine my design?
A: Don’t use sharp corners on the inside, walls that are too thin, or extra decorative features that aren’t needed. Whenever you can, use fillets and standard sizes.