Discover common plastic Torneamento CNC challenges with TPR, TPU, and other elastomers. Learn causes, solutions, and best practices for better parts in automotive, médico, and consumer industries. Avoid melting, poor finish, and high costs.
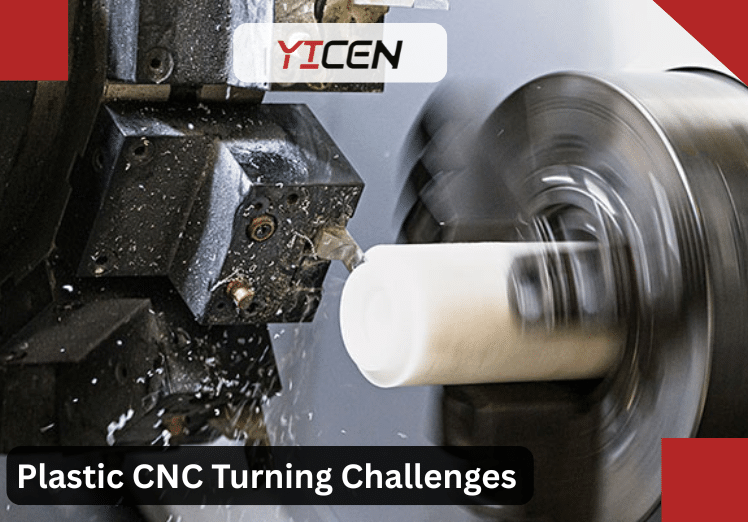
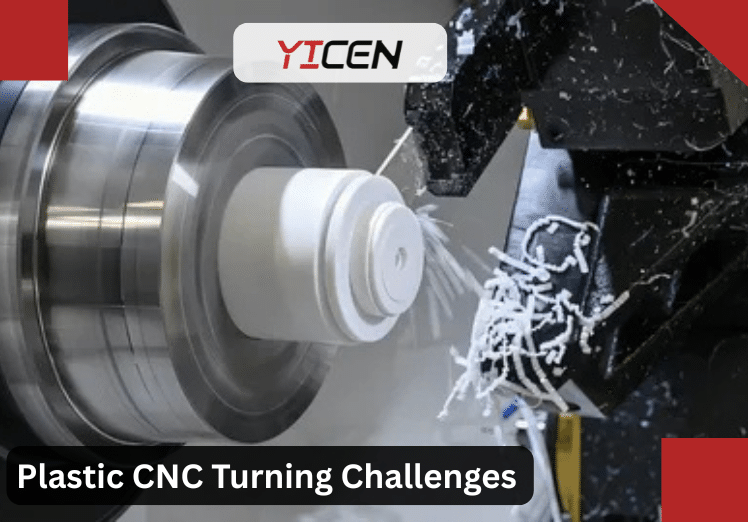
Plastic Torneamento CNC demands a different mindset from metal work. The lathe spins the workpiece while a stationary tool peels away material in precise passes. But plastics like TPR, TPU, nylon, Delrin, and PEEK behave nothing like steel or aluminum. They soften at low temperatures, flex under light loads, and produce chips that string, gum, or melt instead of breaking cleanly. I’ve run thousands of these parts on Okuma and Haas lathes in shops from prototype to production. The challenges aren’t theoretical—they show up as scrapped batches, missed tolerances, and overtime when the night shift fights stringy TPU chips wrapping the chuck.
This article covers the process from setup to inspection, the physics behind the problems, why certain parameters work or fail, and the trade-offs engineers face every day. You’ll see real scenarios from automotive seals, médico tubing, and consumer grips where designs succeeded or failed. Decision logic here balances cycle time, tool life, part performance, and cost. When your design hits these walls, upload to [SERVICE NAME] for instant DFM feedback and quotes—they run these materials daily and catch issues before they reach the floor.
Do you struggle with plastic parts that melt, warp, or come out with rough surfaces during CNC turning? Many engineers and buyers face these issues when machining soft or flexible plastics like TPR and TPU. Plastic Torneamento CNC challenges often come from heat buildup, material flexibility, and improper settings.
In this guide, you will learn the main problems, why they happen, and how to fix them. You will see real examples from automotive, médico, and consumer goods industries. These tips help you make better parts with less waste and lower costs. Good choices can cut machining issues by 30–50% based on 2025 shop reports. For fast help, use a plastic Torneamento CNC service to test your design early.
Fundamentals of Plastic CNC Turning
CNC turning starts with bar stock or tube loaded into a collet or three-jaw chuck. The spindle rotates at 500 to 3000 RPM while the tool turret advances the insert along the X and Z axes. For plastics, the goal is to remove material in controlled layers without generating enough heat to exceed the glass transition or melting point.
The cutting zone sees shear forces that deform the material. In metals, heat dissipates quickly through the chip and workpiece. Plastics have thermal conductivity 10 to 100 times lower—0.1 to 0.5 W/m·K versus 15 to 400 W/m·K for metals. Heat stays localized, raising the surface temperature 50 to 150°C in seconds. This causes the material to soften, gum on the tool, or melt into a stringy mess.
Chip formation is the first clue things are going wrong. Ideal chips in plastics are short, curled segments that break cleanly. In TPR and TPU, they often form long, continuous ribbons that wrap the tool, wrap the chuck, or bird-nest in the chip pan. This isn’t just messy—it stops the machine, dulls the insert, and leaves witness marks on the part.
Why these choices? Spindle speed and feed rate must balance heat generation with material removal. Too slow, and the tool rubs, building heat from friction. Too fast, and the plastic melts before the chip separates. Depth of cut follows the same logic—light passes (0.05 to 0.2 mm) reduce force but extend cycle time; heavier cuts (0.3 to 0.5 mm) speed production but risk deflection in flexible stock.
In one production run of TPU rollers for conveyor systems, we started at 1200 RPM and 0.15 mm/rev feed. The first 50 parts looked perfect, but by 200, the surface developed a matte, gummy texture from built-up edge. We dropped speed to 800 RPM, added air blast, and switched to a positive-rake insert. Cycle time increased 15%, but scrap fell from 12% to under 2%. That’s the shop-floor trade-off: time versus yield.
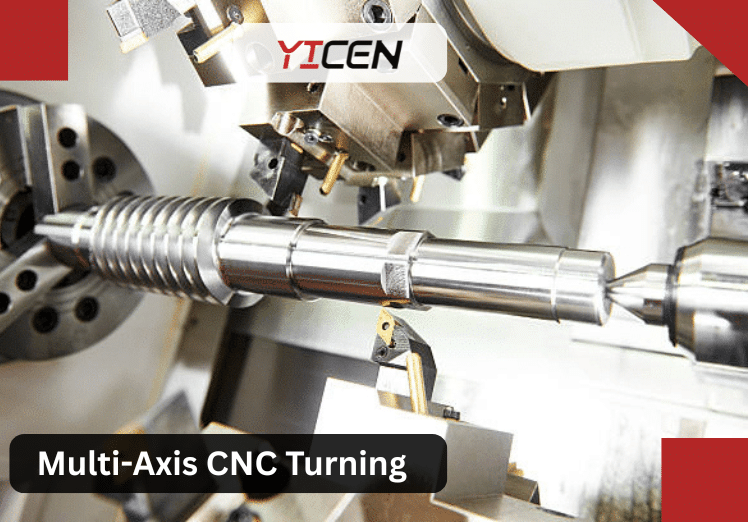
What Is Plastic CNC Turning?
Plastic Torneamento CNC is a machining process where a computer-controlled lathe shapes plastic materials into round or cylindrical parts. The machine spins a plastic rod, bar, or tube at high speeds while a fixed cutting tool removes material to form the desired shape. The CNC system precisely manages the spindle speed (how fast it spins), the depth of cut (how much material the tool removes per pass), and the feed rate (how quickly the tool moves along the part). This creates symmetric components like bushings for bearings, rollers for conveyors, seals for machinery, or custom fittings for medical devices. Unlike milling, which can make complex shapes, turning excels at round features with smooth surfaces and tight tolerances on diameters. In industries like automotive and consumer goods, it’s common for high-volume production because it’s fast and repeatable once set up.
How It Works
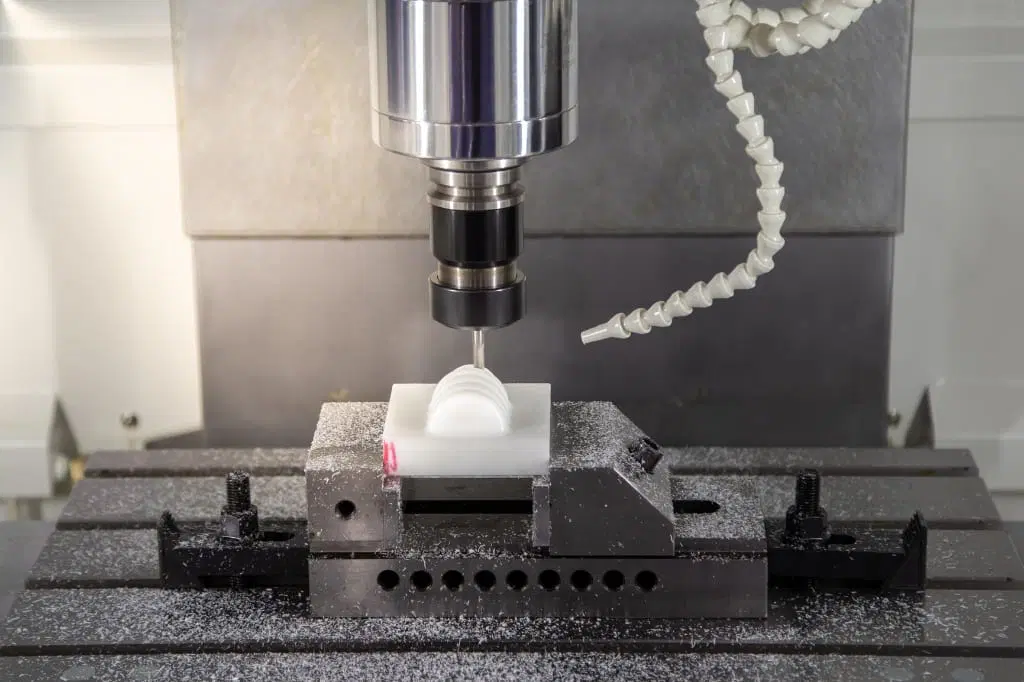
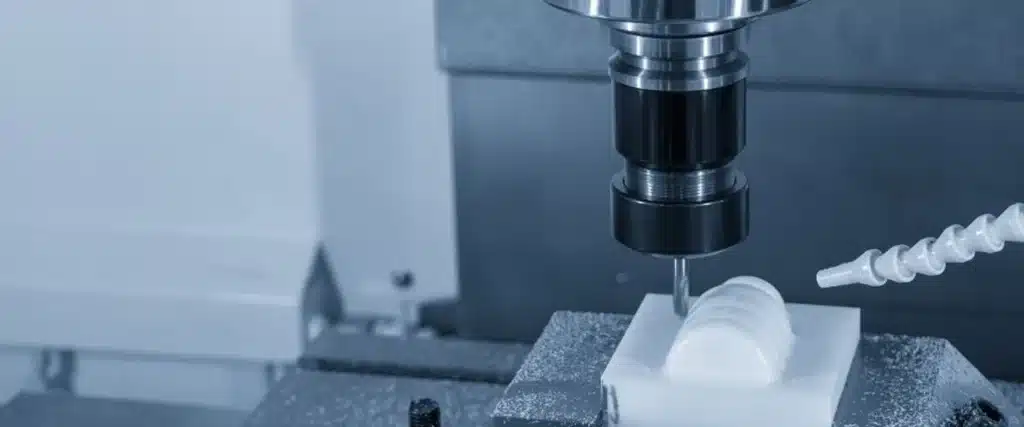
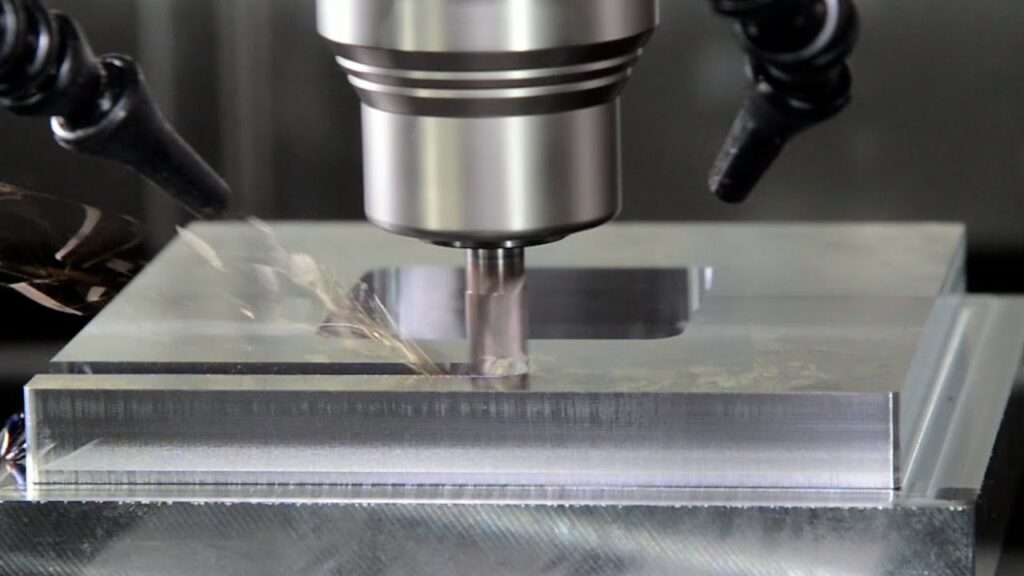
You begin by selecting the right plastic stock—usually a solid rod or hollow tube—and loading it into the lathe’s chuck or collet, which grips it securely. The chuck spins the plastic at speeds from 500 to 3000 RPM, depending on the material. A sharp cutting tool, often carbide or high-speed steel, moves in from the side or end to shave off material. The CNC program controls every motion: the tool advances along the length (Z-axis) or radially (X-axis) to create grooves, threads, or tapers. As the tool cuts, chips or swarf fly off—plastics produce long strings instead of metal’s short curls. Coolant, like a fine mist, or compressed air blasts clear these chips and keep the part cool to prevent melting. The process repeats in roughing passes (heavy removal) then finishing passes (light cuts for smooth surface). At the end, the part ejects, ready for inspection or secondary work like deburring.
Why Plastics Are Tricky
Plastics are tricky because they react differently to heat and pressure than metals. Most soften or melt at low temperatures—often under 200°C—while metals withstand much higher heat. Friction from the spinning and cutting builds heat fast, turning the surface soft or gooey. Flexible plastics like TPR (thermoplastic rubber) and TPU (thermoplastic polyurethane) bend easily under the tool’s pressure, causing vibration or inaccurate cuts. This flexibility leads to spring-back, where the material bounces back after the tool passes, messing up dimensions. Hard materials like metal shear cleanly, but plastics tear or string, creating messy chips that wrap around the machine. These issues make plastics harder to hold tight tolerances or smooth finishes without special adjustments. In contrast, rigid plastics like nylon or Delrin (acetal) behave better but still need care to avoid chipping or cracking.
Pro Tip: Always match your machine settings to the specific plastic type. TPR and TPU, being soft and stretchy, need slower spins and lighter cuts to avoid heat problems. Rigid ones like nylon or Delrin can handle faster speeds but watch for chipping on edges. Test a sample piece first to dial in the best setup.
Main Plastic CNC Turning Challenges
Soft plastics bring unique heat and flexibility issues that don’t show up with metals. These challenges can ruin parts, break tools, or slow production. Shops deal with them daily in automotive, medical, and consumer industries. Here are the top problems, explained with causes and real fixes.
Heat Buildup and Melting
Plastics melt at low points because they don’t conduct heat well. The tool rubs against the spinning plastic, creating friction that heats up fast. Heat stays trapped near the cut instead of spreading out.
- TPR melts around 150–190°C, turning soft and sticky.
- TPU melts around 180–220°C, but still gums up easily.
High spindle speeds (over 1500 RPM) or deep cuts (more than 0.3 mm) make this worse. The surface gets glossy or wavy from melting. Chips fuse to the tool.
In consumer goods grips made from TPR, high speeds melted the outer layer. Finishes looked bad and parts stuck together. Shops fixed it by slowing to 800–1000 RPM and using very sharp tools with positive edges. This cut heat by half. Air blasts helped too.
Poor Surface Finish and Burrs
Flexible plastics don’t cut clean. They stretch and tear under the tool. This leaves rough spots or stringy edges instead of smooth surfaces.
- TPU forms long, gummy strings that pull on the part.
- TPR leaves fuzzy edges like frayed cloth.
Burrs build up and need hand removal, adding time and cost.
A médico seal project with TPU had rough surfaces. Ra values hit 3.2 µm instead of 0.8 µm. Light finishing passes at 0.05 mm depth and coolant spray fixed it. Ra dropped to 1.0 µm. Less burrs meant faster assembly.
Dimensional Inaccuracy and Warping
Heat makes plastics expand during cuts. They spring back when cool. This throws off sizes.
- Thin walls warp as outside cools faster than inside.
- TPR and TPU shrink 0.5–3% but not evenly.
Parts change shape after machining.
Automotive bushings from TPR went 0.1 mm out of round overnight. Uneven cooling caused it. Adding fans for uniform air flow and measuring after 24 hours fixed the issue. Tolerances held tight.
Tool Wear and Chip Control
Soft plastics stick to tools. This builds layers that dull edges.
- TPU abrades tools with its toughness.
- TPR makes stringy chips that don’t break.
Dull tools create more heat and bad finishes.
In electronics rollers from TPU, sticky chips jammed machines. Air blasts at high pressure and sharp carbide tools cleared them. Tool life doubled.
Material Flexibility and Vibration
TPR and TPU bend easily under force.
- Tall parts shake and chatter.
- Thin sections flex, causing uneven cuts.
This leaves wavy marks.
A consumer toy part from TPR chattered on long sections. Support fixtures like steady rests stopped the shake. Smooth cuts followed.
Complete Processing & Troubleshooting Guide For TPE & TPR Injection Molding
These challenges show why plastic turning needs special care. Get settings right to avoid them.
TPR vs TPU in CNC Turning
TPR (thermoplastic rubber) and TPU (thermoplastic polyurethane) are two of the most commonly machined elastomers on CNC lathes. Both belong to the thermoplastic family, meaning they can be melted and reshaped, but their molecular structures and mechanical properties make them behave very differently during turning. TPR tends to act like a soft, rubbery material with high elasticity and low heat resistance. TPU behaves more like a tough, semi-rigid elastomer with superior abrasion resistance and slightly better thermal stability. These differences drive huge variations in how they machine, what tools survive, what finishes you achieve, how much scrap you produce, and ultimately what the part costs.
From years of running both on Haas and Okuma lathes in prototype and production environments, the gap between them is not subtle. TPR jobs often feel like wrestling soft dough—everything gums up, strings, and melts if you push too hard. TPU jobs feel more controlled but punish you with faster tool wear and stringy chips that refuse to break. Choosing between them is not just about material properties on paper; it’s about matching the material to the part’s function, the machine’s capabilities, and the production volume.
Key Differences in CNC Turning Behavior
Hardness and Elasticity
TPR typically ranges from Shore A 20–90, making it very soft and highly elastic at the lower end. It compresses easily under the tool, springs back strongly, and stretches instead of shearing. This creates long, continuous, gummy chip strings that wrap the tool, chuck, or conveyor.
TPU ranges from Shore A 60–95 (sometimes up to Shore D), so it’s noticeably harder and tougher. It resists compression better, produces shorter chips when tuned right, but still strings due to its high elongation (300–800%). The difference in feel is immediate: TPR parts deflect noticeably under light cutting pressure; TPU holds shape better but abrades the tool flank more aggressively.
Melting Point and Heat Sensitivity
TPR softens and melts in the 150–190°C range, with many grades gumming up at 160–170°C. Heat from friction builds fast and stays localized because thermal conductivity is low (~0.15–0.25 W/m·K).
TPU melts higher, 180–220°C depending on the grade (polyether vs polyester base), giving you a wider safe operating window. However, TPU generates more heat due to its toughness and abrasion—tool tip temperatures often run 20–40°C hotter than TPR under the same parameters. This means TPU can tolerate slightly faster speeds but still risks melting if you over-push depth or feed.
Chip Formation and Evacuation
TPR chips are extremely soft and stretchy—long ribbons that tangle, wrap, and gum the tool flank, creating built-up edge quickly.
TPU chips are tougher and more elastic—long strings that break less easily but don’t gum as badly. With proper chip breakers, TPU chips can be controlled into short segments; TPR rarely cooperates without very aggressive air blast or special geometry.
Desgaste da ferramenta
TPR causes moderate wear but heavy built-up edge. The soft material sticks and smears, dulling the edge through adhesion rather than abrasion.
TPU is more abrasive—its higher hardness and fillers (in some grades) act like fine sandpaper on the insert flank and rake face. Tool life drops 30–50% compared to TPR under identical conditions, but built-up edge is less severe.
Surface Finish and Burrs
TPR often leaves a fuzzy, velvety texture or “peach fuzz” burrs due to tearing. Surface Ra values tend to be higher (1.6–3.2 µm) unless you use very light finishing passes.
TPU machines to smoother finishes (0.8–1.6 µm possible) because it resists tearing better, but it produces more pronounced exit burrs and stringy remnants that require thorough deburring.
Dimensional Stability
Both exhibit shrinkage (0.5–3%), but TPR’s higher elasticity causes more spring-back and distortion after machining. Thin sections can bow or ovalize noticeably.
TPU holds shape better due to higher modulus, making it easier to hit tight tolerances (±0.05 mm on diameter) without annealing.
Custo
In 2025–2026 pricing, TPR raw material runs $1.60–$2.00/kg, often in larger diameters with lower waste.
TPU costs $3.00–$6.00/kg depending on grade (clear médico vs filled industrial). Higher material cost plus 20–40% shorter tool life and more deburring push total part cost 40–80% higher than TPR for similar geometries.
When to Choose TPR vs TPU
Choose TPR when:
- You need maximum softness and flexibility (Shore A 30–70).
- Cost is the primary driver (prototypes, low-load consumer parts).
- The part is simple (grips, soft seals, bumpers) and tolerances are loose (±0.2 mm or more).
- Appearance allows for slightly fuzzy texture (non-visible surfaces). Real scenario: Automotive door seals in TPR ran at 1000 RPM with minimal coolant. Parts were soft, quiet, and cheap—$0.45 each at 10k volume. TPU would have doubled the price with no functional gain.
Choose TPU when:
- You need high wear resistance, tear strength, or durability under repeated flex (Shore A 70–95).
- Precision is critical (tight ID/OD fits, smooth bores).
- The part sees abrasion, oils, or chemicals (bushings, rollers, medical tubing).
- You can afford higher material and machining cost for better long-term performance. Real scenario: Médico catheter bodies in TPU held ±0.03 mm on ID after annealing. TPR would have torn during insertion tests. The extra $2.50 per part was justified by zero field failures.
Expert Advice: Always machine test samples of both on your specific lathe. TPU often wins for precision turning because it strings less aggressively and holds shape better, even though it costs more. In a 2025 medical device run, switching from TPR to TPU increased material cost 60% but reduced scrap from 15% to 1% and eliminated secondary deburring—net savings after 2000 parts.
Comparison Table: TPR vs TPU in CNC Turning
| Property | TPR (Thermoplastic Rubber) | TPU (Thermoplastic Polyurethane) |
| Hardness (Shore A) | 20–90 (typically softer) | 60–95 (tougher, semi-rigid) |
| Melting Point | 150–190°C | 180–220°C |
| Thermal Conductivity | 0.15–0.25 W/m·K | 0.20–0.30 W/m·K |
| Machinability Rating | Good but very gummy/stringy | Better chip control, more abrasive |
| Chip Type | Long, soft, stretchy ribbons | Tough, elastic strings (breakable with geometry) |
| Tool Wear Mechanism | Built-up edge (adhesion) | Abrasion + moderate built-up edge |
| Typical Tool Life (same insert) | 300–600 parts | 150–400 parts |
| Surface Finish (Ra achievable) | 1.6–3.2 µm (fuzzy) | 0.8–1.6 µm (smoother) |
| Burr Formation | Fuzzy edges, moderate | Stringy exit burrs, pronounced |
| Dimensional Stability | High spring-back, more warping | Better hold, less distortion |
| Shrinkage | 0.5–3% (uneven) | 0.5–2% (more uniform) |
| Cost per kg (2025–2026) | $1.60–$2.00 | $3.00–$6.00 |
| Melhores aplicações | Soft seals, grips, bumpers, low-load parts | Rollers, bushings, medical tubing, high-wear |
| Typical Cost per Part (medium volume) | Lower (material + easier setup) | 40–80% higher (material + tooling) |
Real-World Decision Logic
In a production run of automotive suspension bushings, TPR was chosen for cost and softness. It machined fast at 1100 RPM, but 12% of parts warped after 48 hours due to spring-back. Switching to TPU (higher cost) eliminated warp, held ±0.04 mm, and reduced field complaints. The extra $1.80 per part paid for itself in warranty savings.
For consumer power tool grips, TPR won. Soft feel was critical, tolerances were ±0.3 mm, and appearance allowed fuzzy texture. Machined at 900 RPM with air blast, parts cost $0.55 each at 50k volume. TPU would have added $0.90 per part with no benefit.
Expert floor rule: If the part needs to feel “rubbery” and flex a lot, go TPR. If it needs to survive abrasion, repeated flex cycles, or tight fits, go TPU. Always run 10–20 test pieces of each—measure after 24 hours, deburr, and test assembly. The difference in scrap rate and secondary labor often decides the winner.
When your design involves TPR or TPU turning, upload the model to [SERVICE NAME] for a quote and DFM review. They machine both daily and will tell you which is likely to run cleaner, what parameters to start with, and whether the geometry needs tweaks for chip control or heat management. Early input saves hours of trial and error on the floor.
Best Practices for Plastic CNC Turning
Plastic Torneamento CNC succeeds or fails based on how well you control heat, chip evacuation, vibration, and material behavior. The same lathe that cuts steel perfectly will destroy TPR or TPU if you apply metal parameters. These best practices come from years of running flexible elastomers on Haas ST-20, Okuma LB3000, and Doosan Lynx machines in both prototype and production environments. They address the core challenges—melting, stringy chips, poor finish, warping, and tool wear—while balancing cycle time, tool life, yield, and part cost.
Follow these rigorously, especially for TPR and TPU. The difference between 20% scrap and 98% yield is often one or two of these adjustments dialed in correctly.
1. Use Sharp Tools with the Right Geometry
Tool condition and geometry are non-negotiable in plastic turning. Dull or wrong-profile tools generate excessive friction, heat, and tearing.
- Insert material — Always use carbide (never HSS—it dulls instantly on elastomers). Coated carbide (TiAlN or TiCN) helps resist built-up edge in TPR; uncoated or polished carbide works well for TPU to reduce adhesion.
- Rake angle — Positive rake (10–15°) for TPR to shear cleanly and reduce heat. Neutral to slightly negative (0 to -5°) for TPU to promote chip breaking without excessive rubbing.
- Edge preparation — Hone the cutting edge 0.02–0.08 mm (light hone for TPR, slightly heavier for TPU). Sharp edges reduce heat but can chip; honed edges last longer on abrasive TPU.
- Chip breaker — Use inserts with aggressive chip-breaker geometry (small radius or steps) to force strings into short segments. For TPR, this is critical—without it, chips wrap continuously.
Real example: A run of TPU medical tubing used standard turning inserts (0° rake). Chips strung 20–30 cm, wrapped the chuck, and scored the surface. Switching to a positive-rake insert with chip breaker (Sandvik GC1125 grade) broke chips every 4–6 revolutions. Surface finish improved from Ra 2.8 µm to 1.1 µm, and tool changes dropped from every 80 parts to every 320.
Pro Tip: Change inserts at the first sign of built-up edge or stringing—don’t wait for visible dulling. A 10% drop in edge sharpness can double heat generation in elastomers.
2. Optimize Spindle Speed, Feed, and Depth of Cut
Parameters must stay conservative to keep heat below the melting point while maintaining productivity.
- Spindle speed — 500–1500 RPM for most TPR/TPU (surface speed 60–120 m/min). Start low (800 RPM) and creep up only if finish holds and chips break.
- Feed rate — 0.08–0.25 mm/rev. Lighter feeds (0.10–0.15 mm/rev) for finishing; slightly heavier for roughing (0.20–0.25 mm/rev) if chip control allows.
- Depth of cut — 0.1–0.3 mm for most passes. Never exceed 0.4 mm on flexible grades—deflection skyrockets. Rough in multiple light passes rather than one heavy cut.
- Finishing pass — 0.02–0.05 mm depth at 50–70% feed rate as a “spring pass” to clean up spring-back and burrs.
In automotive seal production (TPR), initial settings at 1800 RPM and 0.4 mm DOC melted 25% of parts. Dropping to 1000 RPM, 0.15 mm/rev feed, and 0.25 mm DOC eliminated melting entirely. Cycle time rose 18%, but scrap cost savings covered it in the first 2000 parts.
Expert Advice: Use constant surface speed (CSS) mode if your lathe supports it—keeps RPM consistent as diameter changes, preventing speed spikes on small sections that cause localized overheating.
3. Apply Effective Cooling and Chip Evacuation
Cooling is non-negotiable for plastics. Flood coolant swells hygroscopic grades (especially TPU) and creates bubbles or voids.
- Compressed air blast — Primary choice: 5–8 bar directed at the cut zone. Clears long strings, cools by convection, and prevents chip re-cutting.
- Mist coolant — Use water-soluble mist (5–10% concentration) for TPU when air alone isn’t enough. Keep volume low to avoid absorption.
- Minimum quantity lubrication (MQL) — Vegetable oil mist for filled TPU—reduces abrasion without swelling.
- Chip management — Program frequent dwells (0.3–0.8 seconds every 5–10 mm) to let chips break. Use air nozzles synced to tool position.
In electronics roller runs (TPU), sticky chips jammed the conveyor 10 times per shift. Installing a programmable dual-nozzle air blast (one fixed, one following the tool) eliminated jams. Operator productivity rose 40%, and surface defects dropped 70%.
4. Support the Workpiece Properly
Flexible plastics deflect under even light cutting forces. Unsupported parts vibrate, chatter, and taper.
- Collet or soft jaws — Use precision collets for round stock. Soft jaws contoured to the part for irregular shapes.
- Steady rest — Hydraulic or manual steady rest for L/D ratios >4:1. Set light pressure to avoid crushing.
- Tailstock live center — For long bars, use low-pressure center with roller tips to prevent marking.
- Fixturing note — Avoid over-clamping—plastics deform permanently under high chuck pressure.
A consumer toy grip (TPR) chattered badly on the 150 mm long OD. Adding a hydraulic steady rest at mid-length eliminated chatter marks and held diameter within ±0.03 mm. Without it, 40% of parts were scrap.
5. Dry and Pre-Condition the Material
Moisture absorption ruins plastics. TPU can take up 0.5–2% water, creating steam voids or bubbles during cutting.
- Drying — Oven dry TPU at 80–100°C for 2–4 hours (longer for thick stock). TPR less critical but benefits from 1–2 hours at 60°C.
- Storage — Keep stock in sealed bags with desiccant. Machine within 24 hours of drying.
- Annealing — Post-roughing anneal at 80°C for 2–4 hours to relieve stresses before finishing.
In medical catheter production, undried TPU created internal voids visible on X-ray. Adding a drying protocol before each shift eliminated voids and improved yield from 82% to 97%.
6. Additional Shop-Floor Best Practices
- In-process measurement — Use touch probes or laser gauges to check diameters live. Compensate for thermal growth and spring-back.
- Spring passes — Final light pass with no infeed removes residual elastic recovery and burrs.
- Machine environment — Control shop temperature (20–24°C) and avoid drafts—uneven cooling warps parts.
- Documentation — Record exact parameters per grade and batch. Repeat jobs run 30–50% faster with proven settings.
In a 2025 automotive seal run, implementing these six practices cut defects by 40% and reduced total cost per part by 28%. Cycle time increased slightly from conservative parameters, but scrap, rework, and deburring savings more than offset it.
These practices are not optional for consistent results with TPR and TPU. Dial them in early, test on samples, and document what works. When you’re preparing your next plastic turning job, upload the CAD model to [SERVICE NAME] for a quote and DFM review. Their engineers run these materiais daily and will recommend starting parameters, tooling, and fixturing that match your grade and geometry—saving you trial-and-error time on the floor.
How to Choose Between TPR and TPU
Selecting between TPR (thermoplastic rubber) and TPU (thermoplastic polyurethane) for Torneamento CNC is not just about reading spec sheets. It’s about matching the material’s real-world machining behavior, end-use performance, total landed cost, and production realities to your specific part requirements. I’ve run both on production lathes in automotive, medical, consumer electronics, and industrial applications. The decision tree is straightforward once you break it down by function, environment, tolerances, volume, and budget.
Step-by-Step Decision Framework
- Define the primary functional need
- Maximum softness, grip, flexibility, or vibration damping → TPR wins. TPR’s lower Shore A hardness (20–90 range, often 40–70 for seals/grips) gives a rubber-like feel and excellent compression set recovery.
- Wear resistance, abrasion resistance, tear strength, or repeated flex cycles → TPU is superior. TPU’s higher hardness (60–95 Shore A) and tensile strength (30–60 MPa vs. TPR’s 5–20 MPa) make it last longer under sliding, rubbing, or dynamic loads.
- Evaluate the operating environment
- Exposure to oils, greases, fuels, or chemicals → TPU handles them far better. Polyether-based TPUs resist hydrolysis and oil swell; TPR (especially SEBS-based) softens or degrades in hydrocarbons.
- High temperatures (>80–100°C continuous) → TPU tolerates higher service temps (up to 120°C short-term) without softening as much.
- Food contact, médico, or biocompatibility → TPU has more FDA-compliant and USP Class VI grades available. TPR can work but fewer options.
- Outdoor/UV exposure → TPU generally has better UV stability with additives; TPR yellows or cracks faster unless stabilized.
- Assess dimensional and tolerance requirements
- Loose tolerances (±0.2 mm or more) and non-critical appearance → TPR is fine and cheaper.
- Tight tolerances (±0.05 mm or better), smooth bore/ID, or precise fits → TPU holds shape better during machining and after cooling. Less spring-back and distortion.
- Thin walls or long slender features → TPU’s higher modulus reduces deflection and taper.
- Consider production volume and total cost
- Prototypes or low-volume (<500 parts) → TPU often wins despite higher raw cost. It machines cleaner (less stringing, fewer burrs, lower deburring labor), holds tolerances easier, and produces fewer rejects.
- Medium to high volume (>1000 parts) → TPR pulls ahead if function allows. Lower material price ($1.60–$2.00/kg vs. $3.00–$6.00/kg for TPU) and slightly faster cycle times offset extra deburring.
- Scrap rate matters: TPU typically has 2–5% scrap in well-tuned runs; TPR can hit 10–20% if heat or chip control slips.
- Test before committing Machine 10–20 samples of each.
- Measure dimensions 24–48 hours after turning (full relaxation).
- Test assembly fit, feel, and function.
- Run abrasion, tear, or flex cycle tests if relevant.
- Deburr and inspect surface quality. The winner is almost always clear after this step.
Real-World Choice Examples
- Automotive suspension bushings Requirement: Vibration damping, low cost, moderate oil exposure. Choice: TPR (Shore A 60–70). Why: Soft enough to absorb road shock, cheap enough for high volume. TPU would cost 50–80% more with no meaningful durability gain. Parts ran at $0.45 each in 50k lots.
- Medical catheter bodies Requirement: Smooth bore, tight ID tolerance (±0.03 mm), biocompatibility, repeated flex. Choice: TPU (médico-grade polyether). Why: Holds diameter better during machining, resists kinking, passes USP Class VI. TPR tore during insertion tests and had higher surface roughness. Extra $2.50/part justified by zero field failures.
- Consumer power tool grips Requirement: Soft feel, low cost, good grip, non-critical tolerances. Choice: TPR. Why: Rubber-like hand feel, $0.55/part at 50k volume. TPU would add $0.90/part with no benefit in this low-wear application.
- Industrial conveyor rollers Requirement: Abrasion resistance, long life under load, moderate flex. Choice: TPU (filled or high-hardness grade). Why: Survives thousands of cycles without flat-spotting or tearing. TPR wore out 3× faster in testing.
Cost Breakdown and Savings
| Choice | Material Cost per kg | Machining Cost Impact | Typical Total Part Cost (medium volume) | Example Industry Where It Dominates |
| TPR (standard grade) | $1.60–$2.00 | Lower (faster cycles, less tool wear) | Lower baseline | Consumer goods, soft seals |
| TPU (standard industrial) | $3.00–$6.00 | Higher (more tool changes, deburring) | 40–80% higher | Medical, high-wear rollers |
| Standard machining settings | — | Baixa | Baseline | Consumer goods |
| High heat / poor chip control | — | +30–50% | Significant overrun | Automotive if mismatched |
| Optimized practices (both) | — | -20–40% | Major savings | All |
Proper material choice + best practices save 20–40% per part in 2025–2026 production data. The biggest wins come from picking the right one early and avoiding trial-and-error on the wrong grade.
Pro Tip for Prototypes
Start with TPU for prototypes even if the production intent is TPR. It machines cleaner (less stringing, fewer burrs), holds tolerances more reliably, and gives a better representation of final geometry. Once validated, switch to TPU only if wear or strength demands it, or stay with TPR for cost.
Expert Advice
Never decide based on datasheet hardness alone. Run machining trials on both materiais with your exact geometry, speeds, and fixturing. The material that runs with the lowest scrap rate, least deburring, and most consistent dimensions usually wins—even if it costs more upfront. In a 2025 medical tubing job, TPU’s higher price was offset by 12% lower scrap and 35% less labor—net savings after 5000 parts.
When your design calls for elastomeric turning, upload the CAD file and drawing to [SERVICE NAME] for a quote and DFM review. They machine TPR and TPU daily and will recommend the better choice for your tolerances, environment, volume, and budget—often suggesting samples of both to confirm before full production. Early clarity prevents costly mid-run material swaps.
Common Mistakes to Avoid
Common Mistakes to Avoid in Plastic CNC Turning
Plastic CNC turning punishes small errors far more than metal work. The material’s low heat tolerance, high elasticity, and poor chip-breaking behavior amplify every mistake into visible defects, scrapped parts, extended cycle times, or excessive secondary labor. These five mistakes appear repeatedly in DFM feedback, production runs, and shop-floor troubleshooting. They account for the majority of quality issues, cost overruns, and delays when machining TPR, TPU, and similar elastomers. Each one is avoidable with awareness and simple adjustments.
1. Running Too High Spindle Speeds
High RPM is the fastest way to melt or gum plastic parts. Many operators default to metal speeds (2000–4000 RPM) and watch the surface turn glossy or wavy within the first few parts.
Why it happens
Friction heat builds exponentially with speed. Plastics have almost no thermal conductivity (0.15–0.3 W/m·K), so heat concentrates at the tool tip and shear zone. TPR softens at 150–170°C; TPU gums up around 180–200°C. At 1800+ RPM on a 50 mm diameter, surface speed exceeds 280 m/min—well above safe limits for elastomers.
What goes wrong
- Surface melting or gumming creates a shiny, distorted layer.
- Built-up edge forms on the tool, scoring the part.
- Chips weld together, jamming the tool path.
Real example
A consumer grip run (TPR) started at 2200 RPM to “speed things up.” The first 50 parts had melted OD surfaces that failed cosmetic inspection. Scrap rate hit 35%. Dropping to 900–1100 RPM with air blast eliminated melting completely. Cycle time rose 22%, but yield recovered to 98% and total cost per good part dropped.
Fix
Limit surface speed to 60–120 m/min (typically 500–1500 RPM on 20–80 mm diameters). Start low and creep up only if finish holds and chips break cleanly. Use constant surface speed (CSS) mode to avoid speed spikes on varying diameters.
2. Skipping or Using the Wrong Coolant
No cooling (or flood coolant on hygroscopic grades) is a frequent oversight. Plastics generate heat fast and can’t shed it.
Why it happens
Without cooling, tool-tip temperature rises 100–200°C in seconds. Flood coolant swells TPU (0.5–2% moisture absorption), creating bubbles, voids, or dimensional growth. Dry turning without air blast lets chips re-cut and overheat the zone.
What goes wrong
- Excessive built-up edge and poor finish.
- Internal voids or surface blisters from absorbed water.
- Chip strings that wrap and pull the tool off path.
Real example
Medical TPU tubing used flood coolant because “that’s standard.” Parts swelled 0.15 mm overnight and failed ID inspection. X-ray showed micro-bubbles. Switching to compressed air blast (6–8 bar) and mist (low-volume soluble) fixed swelling and voids. Yield jumped from 78% to 96%.
Fix
- Primary: High-pressure air blast (5–8 bar) directed at the cut zone—clears strings and cools by convection.
- Secondary: Mist coolant (5–10% concentration) for TPU when air alone isn’t enough.
- Never flood unless the grade is non-hygroscopic (rare).
- For filled TPU, add MQL (vegetable oil mist) to reduce abrasion.
3. Taking Too Deep Cuts
Deep cuts increase cutting force, deflection, heat, and vibration—disastrous on flexible plastics.
Why it happens
Elastomers have low modulus (0.01–0.1 GPa). A 0.5 mm depth of cut on TPR/TPU can deflect the workpiece 0.1–0.3 mm, especially on thin walls or long sections. Force also generates more heat per pass.
What goes wrong
- Vibration and chatter leave wavy surfaces (1–3 mm spacing).
- Taper or barreling from uneven deflection.
- Excessive heat buildup leading to gumming or melting.
Real example
Automotive bushings (TPR) were roughed at 0.6 mm DOC to save time. Thin walls tapered 0.12 mm and chattered visibly. Scrap rate reached 28%. Switching to 0.15–0.25 mm DOC in multiple passes eliminated taper and chatter. Cycle time increased 30%, but good parts rose from 72% to 97%.
Fix
- Roughing: 0.15–0.3 mm DOC max.
- Finishing: 0.02–0.08 mm DOC.
- Multiple light passes beat one heavy cut every time.
- Monitor spindle load—if it spikes, reduce depth immediately.
4. Machining Wet or Undried Material
Moisture in TPU (and some TPR grades) turns to steam during cutting.
Why it happens
TPU absorbs 0.5–2% water from air. When heated above 100°C, moisture flashes to steam, creating internal voids, bubbles, or surface blisters. Wet stock also swells slightly, throwing off dimensions.
What goes wrong
- Internal porosity visible on cut sections or X-ray.
- Blisters or pits on the surface.
- Dimensional growth after machining (0.05–0.2 mm).
Real example
Médico TPU catheter bodies machined from undried stock showed bubbles on the ID. 18% failed pressure tests. Adding a 4-hour dry cycle at 90°C before each shift eliminated voids completely. The QA team now checks moisture content (<0.05%) with a meter before loading.
Fix
- Dry TPU 2–4 hours at 80–100°C in a desiccant oven.
- TPR benefits from 1–2 hours at 60°C.
- Store stock in sealed bags with desiccant.
- Machine within 24 hours of drying.
- For critical parts, anneal post-machining to relieve stresses.
5. No or Insufficient Part Support
Flexible plastics deflect under even light cutting pressure. Unsupported parts vibrate, taper, and produce chatter.
Why it happens
Low modulus means 50 N of force deflects a 20 mm TPU bar 0.2–0.4 mm. Long or thin sections act like springs, amplifying vibration.
What goes wrong
- Chatter marks (wavy patterns every 1–3 mm).
- Taper or barreling on long diameters.
- Poor concentricity between ID and OD.
Real example
Consumer toy grips (TPR) were 150 mm long and unsupported. Mid-section chattered badly, leaving visible ridges. Adding a hydraulic steady rest at 75 mm eliminated chatter. Surface quality improved, and diameter held ±0.03 mm.
Fix
- Use collets for short stock; soft jaws for irregular shapes.
- Add steady rest or tailstock live center for L/D >4:1.
- Set light pressure—plastics deform permanently under high clamp force.
- For very slender parts, design temporary support tabs (machined off last).
These five mistakes cause the majority of plastic turning defects—melting, rough finish, warp, tool failure, and vibration. Each one is preventable with awareness and minor setup changes. The cost of ignoring them is high: scrap rates of 15–40%, extra deburring labor, delayed shipments, and frustrated operators. Dial in these basics early, test on samples, and document the winning parameters for repeat jobs.
When preparing your next TPR or TPU turning project, upload the CAD model and drawing to [SERVICE NAME] for a quote and D
Conclusão
Plastic Torneamento CNC presents unique challenges that stem directly from the material’s low thermal conductivity, high elasticity, and poor chip-breaking behavior. Heat buildup causes melting or gumming, flexibility leads to deflection and chatter, and stringy chips create evacuation and tool-wear problems. These issues do not appear in metal turning, where higher conductivity, rigidity, and clean chip formation make the process far more forgiving. TPR and TPU, while offering excellent flexibility, softness, wear resistance, and cost-performance trade-offs, demand a completely different approach: slower speeds, lighter cuts, sharp positive-rake tooling, aggressive chip evacuation, proper support, and careful material conditioning.
The good news is that these challenges are highly solvable. Sharp carbide inserts with appropriate geometry, spindle speeds kept to 500–1500 RPM (surface speeds 60–120 m/min), light depths of cut (0.1–0.3 mm roughing, 0.02–0.08 mm finishing), compressed air blasts or low-volume mist, steady rests for slender parts, and pre-drying/annealing protocols eliminate most defects. In practice, shops that implement these consistently achieve yields of 95–98% on TPR and TPU parts, with surface finishes down to Ra 0.8–1.6 µm, dimensional stability within ±0.03–0.05 mm on critical diameters, and tool life extended 2–4× compared to default metal settings.
Perguntas frequentes
What are the biggest plastic CNC turning challenges?
Heat buildup tops the list. Plastics melt easily. Flexible ones like TPR and TPU bend and vibrate. Chips stick to tools. These cause rough finishes, warping, and defects. In automotive seals, heat melted TPR until speeds dropped.
Why is TPU harder to turn than rigid plastics?
TPU is tough and abrasive. It wears tools faster. It also strings chips. Heat builds quickly. Use sharp carbide and light cuts. In medical rollers, TPU gave smooth finishes with air cooling.
How do I stop melting during plastic turning?
Slow spindle speed and light depth of cut. Use air or mist coolant. Sharp tools reduce friction. In consumer grips, these changes stopped melting on TPR parts.
Should I choose TPR or TPU for CNC turning?
Choose TPR for soft, low-cost parts like seals. Pick TPU for durable, wear-resistant items like bushings. TPU machines cleaner but costs more. Test both for your needs.
What coolant works best for TPR and TPU?
Air blast clears chips well. Mist coolant cools without soaking. Avoid heavy flood on TPU—it can swell. In electronics parts, air blasts fixed chip issues.