Revisado pela Equipa de Engenharia de Precisão da Yicen | Última atualização: junho de 2026
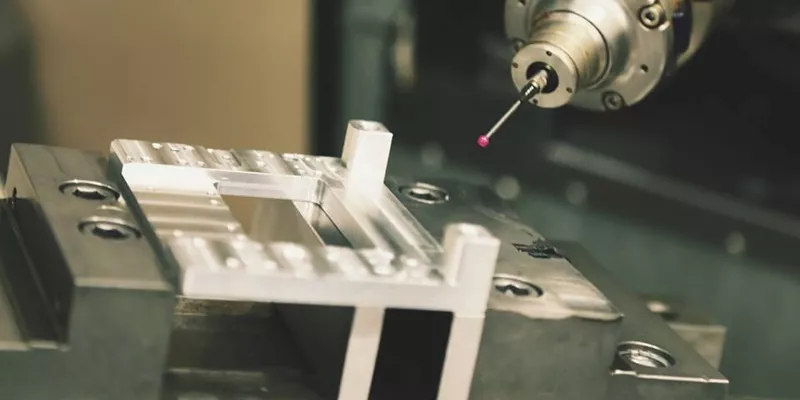
A welding jig or fixture is a tooling device that locates two or more parts in their correct relationship and holds them there while the weld is made, so that every assembly comes out the same shape, the same size, and within tolerance. The defining challenge that sets welding fixtures apart from machining fixtures is heat. Welding pours intense, localized heat into metal, the metal expands, and as it cools it contracts and pulls. A welding fixture exists to fight that movement and deliver a straight, dimensionally accurate weldment instead of a warped one.
That heat problem changes almost every design decision, and most of the material online skips past it. We design and build welding jigs and fixtures as part of our custom jig and fixture work, and the principles below are the ones that decide whether a weldment holds its shape or fights you on every part.
This guide covers the difference between a welding jig and a welding fixture, why distortion control is the heart of the job, the components and design rules that matter, the full range of fixture types from simple clamps to robotic weld cells, materials and spatter, a worked example, and the build-versus-buy decision.
Welding Jig vs Welding Fixture
In a welding shop the two words get used interchangeably, but there is a real distinction worth keeping straight.
A welding jig positions and aligns the parts before and during welding. It establishes the geometry, the angles, and the fit-up. A welding fixture holds and clamps those parts rigidly in place while the arc is running. In practice most welding tooling does both jobs at once, which is why people merge the terms, but the function split matters when you design one. The jigging features control where the parts go. The fixturing features control how hard they are held and how the assembly resists distortion.
The same jig-versus-fixture logic runs through all workholding. If you want the foundational version, we break it down in our guide to the types of jigs and fixtures.
Why Distortion Control Is the Whole Point
Picture a flat steel frame being welded at the corners. The weld zone heats to thousands of degrees while the surrounding metal stays cool. The hot metal wants to expand but the cold metal around it will not let it, so the joint yields under compression. Then it cools and contracts, and now the joint is shorter than it started. Multiply that across several welds and the frame pulls into a parallelogram, the legs splay, or the whole thing bows. None of that shows up until the part comes off the table.
A welding fixture controls this in a few ways at once:
- Restraint. Rigid clamping holds the parts so contraction forces cannot pull them out of position. The fixture takes the load instead of the part.
- Heat management. Copper or brass backing bars and chill blocks draw heat out of the joint. Copper is a favorite because molten steel does not fuse to it, so it acts as a backing without becoming part of the weld.
- Planned compensation. Experienced fixture designers pre-set or pre-bend parts slightly in the opposite direction of the expected pull, so the weldment springs back to true after it cools.
- Weld sequencing and balance. A good fixture lets the operator weld in a balanced sequence and gives access to both sides, so contraction forces cancel instead of stacking up.
Every design choice in the rest of this guide traces back to managing that heat and the movement it causes.
Core Components of a Welding Fixture
| Componente | Função | Welding-specific notes |
| Base / table | Rigid foundation that resists distortion loads | Heavy steel; often a modular table with a grid of holes |
| Locators and stops | Establish correct part position and fit-up | Must leave the joint accessible to the torch |
| Braçadeiras | Hold parts against locators during welding | Placed away from the heat-affected zone, must withstand spatter |
| Backing / chill bars | Draw heat from the joint, support the weld root | Copper or brass so the weld does not fuse to them |
| Locating pins | Repeatable part placement | Often hardened, sometimes retractable for unload |
| Grounding contact | Completes the welding electrical circuit | Reliable clamp-to-work path to avoid arc-through-bearing damage |
The two items engineers underweight are clamp placement and the grounding path. Clamp too close to the joint and you trap heat and block the torch. Ignore the ground path and the welding current finds its own way out, sometimes through a bearing or a pivot, and damages the fixture.
Design Rules Specific to Welding Fixtures
The locating fundamentals are shared with all fixtures, so locate to the Princípio 3-2-1 and foolproof the load the same way you would for machining. On top of that, welding adds its own rules.
Clamp away from the weld zone. Clamps near the joint trap heat, distort locally, and get hammered by spatter. Hold the part on cool, solid areas and let the joint breathe.
Allow for thermal expansion and shrinkage. Do not lock a part so rigidly along its length that expansion has nowhere to go, or it will buckle. Account for the final shrinkage in the fixture geometry so the finished part lands on size, not the starting part.
Build for access. The welder or the robot torch needs a clear line to every joint, often from more than one angle. A fixture that holds the part perfectly but blocks half the welds is useless.
Make it rigid and heavy. Contraction forces are large. A light fixture flexes and lets the part pull. Welding tooling is built heavier than machining tooling for this reason.
Plan for heat and spatter survival. Use materials and coatings that shrug off spatter, and keep precision locating surfaces out of the direct spatter path or make them replaceable.
Provide a clean ground. Give the welding current a deliberate, low-resistance path back from the work so it does not arc through moving parts.
For the full design workflow that these rules sit inside, see our guide to designing jigs and fixtures.
Types of Welding Jigs and Fixtures
Welding tooling ranges from a hand clamp to a multi-station robotic cell. Here is the practical taxonomy, grouped by what the device actually does.
Clamping and Holding Fixtures
The baseline. Locators and stops set the part position, and clamps (toggle, screw, cam, or pneumatic) hold everything during the weld. These are the workhorse fixtures for frames, brackets, and weldments where parts must stay in a fixed relationship.
Solves: holding multiple parts in correct alignment so the weld does not pull them out of position.
Fit-Up and Tack Fixtures
Used to set and tack-weld an assembly before it moves to a full weldout. The fixture guarantees fit-up, the operator runs a few tacks, and the tacked assembly is freed for finishing. This splits a complex job into a fast, repeatable first step.
Solves: locking geometry early so the final welds do not drift.
Welding Positioners
A powered fixture that tilts and rotates the assembly to bring each joint into the easiest welding position, usually flat. Welding in the flat position is faster and produces better welds than overhead or vertical, so positioners raise both quality and output.
Solves: presenting every joint at the optimal angle and removing awkward positions.
Welding Rotators (Turning Rolls)
Sets of powered rollers that rotate cylindrical work such as pipe, tanks, and pressure vessels at a controlled speed while the welder or automated head stays put. The part turns under the arc to lay a continuous circumferential weld.
Solves: continuous, even welds around round parts without manually rolling heavy work.
Manipulators
Move the welding head itself through vertical, horizontal, and rotational travel, usually paired with a positioner or rotator. Common in automated and semi-automated welding of large assemblies.
Solves: precise, repeatable torch travel over large or long joints.
Turntables and Indexing Tables
Rotate or index the assembly between stations or weld positions. In a robotic cell, an indexing turntable lets the robot weld one part while the operator loads the next, so the robot never waits.
Solves: overlapping load time with weld time to keep an expensive cell productive.
Modular Welding Tables
Heavy steel tables drilled with a precision grid of holes that accept clamps, stops, angles, and squares. They reconfigure for any job in minutes, which makes them the standard for fabrication shops running a changing mix of weldments and for both manual and robotic work.
Solves: custom 3D fixturing for varied jobs without building a dedicated fixture each time.
Welding Jigs (Manual Aids)
The simple end of the range: corner and angle clamps, magnetic squares, pipe alignment clamps, and frame jigs. They locate parts at correct angles for tacking and small fabrication work.
Solves: fast, low-cost alignment for one-off and small-batch fabrication.
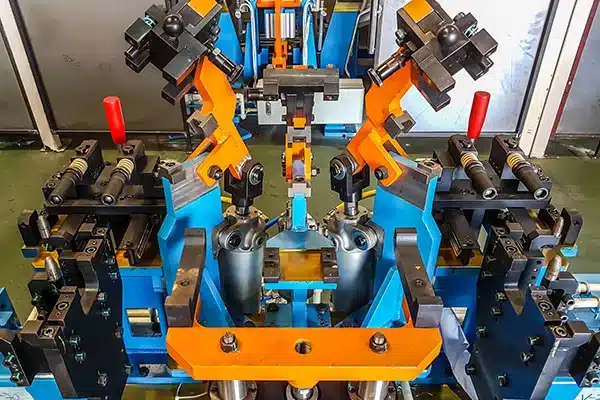
Robotic Welding Fixtures
Purpose-built tooling for robot cells, usually with pneumatic or hydraulic self-centering clamps and often multiple stations. They locate parts precisely enough for blind robot welding and clamp fast enough to keep cycle times low.
Solves: the repeatable, fast, hands-free clamping a robot needs to weld accurately at volume.
Comparison of Welding Fixture Types
| Tipo | Melhor para | Automation level | Custo relativo |
| Clamping / holding fixture | Frames, brackets, general weldments | Manual to pneumatic | Baixa a média |
| Fit-up / tack fixture | Setting geometry before final weld | Manual | Baixa |
| Positioner | Bringing joints to flat position | Powered | Médio a alto |
| Rotator (turning rolls) | Pipe, tanks, vessels | Powered | Médio a alto |
| Manipulator | Large or long joints | Semi to fully automated | Elevado |
| Turntable / index table | Multi-station, robotic cells | Powered | Médio a alto |
| Modular welding table | Varied jobs, fast changeover | Manual or robotic | Médio |
| Manual jigs (clamps, squares) | One-off and small-batch fabrication | Manual | Muito baixo |
| Robotic welding fixture | High-volume automated welding | Totalmente automatizado | Elevado |
Manual vs Semi-Automated vs Robotic Welding Fixtures
The welding method drives the fixture as much as the part does.
| Fator | Manual fixtures | Semi-automated | Robotic |
| Typical welding | TIG, MIG by hand | Mechanized travel, manual setup | Robot torch, automated clamping |
| Fixação | Toggle, screw, cam | Pneumatic | Pneumatic or hydraulic, self-centering |
| Best volume | Baixa a média | Médio | Elevado |
| Location accuracy needed | Operator can adjust | Mais alto | Highest, parts must locate blind |
| Custo inicial | Baixa | Médio | Elevado |
The pattern mirrors machining fixtures. Low volume favors simple manual tooling because the operator can correct small errors. High volume favors precise, powered fixtures because the speed and repeatability pay back across thousands of assemblies.
Materials, Spatter, and Build Quality
Welding fixtures are almost always steel, chosen for strength, weldability, and the rigidity needed to resist contraction. A few material choices are worth calling out.
- Copper and brass for backing and chill bars. Molten steel does not fuse to copper, so it makes an ideal backing that supports the weld root and pulls heat away to limit distortion.
- Spatter-resistant coatings and consumable contacts. Locating surfaces and clamp faces in the spatter path benefit from anti-spatter coatings or replaceable hardened contacts, so the fixture keeps its accuracy.
- Heavy, stress-relieved structures. Fabricated fixture frames are often stress-relieved after welding so the fixture itself does not move over time, which would quietly throw off every part it holds.
This is where welding fixtures share DNA with metal fabrication tooling. If your weldment starts from cut and formed sheet, our fabrico de chapas metálicas and fixture design teams work the two together so the parts fit the fixture and the fixture fits the parts.
A Worked Example: Welding a Square Steel Frame
A shop needs to weld a square frame from four steel tubes, corner to corner, and the frame has to come out square within tolerance every time.
Without tooling, the welder tacks the corners by eye, welds them, and watches the frame pull out of square as each corner cools. Some come out usable, many do not, and checking and reworking eats the schedule.
With a fixture, four corner locators set the tubes at exactly 90 degrees, clamps hold them against the stops, and the design accounts for the small inward pull each corner weld will produce. The welder runs the corners in a balanced sequence so the contraction forces offset. The frame comes off the table square, the same way, every time. The fixture turns a skill-dependent, scrap-prone job into a load, clamp, weld, repeat cycle, which is the entire reason the tooling exists.
Build vs Buy: When a Custom Welding Fixture Pays Off
Simple jigs like corner clamps and magnetic squares are off-the-shelf and cheap. Positioners, rotators, and modular tables are bought as standard equipment. The investment decision is about dedicated, part-specific fixtures, and they pay back through three returns.
Distortion and scrap reduction. A fixture that holds geometry through the heat cycle slashes the warped, out-of-tolerance assemblies that otherwise get reworked or scrapped.
Speed and repeatability. Fast, foolproof clamping cuts setup time on every assembly, and the result does not depend on one welder’s skill.
Quality and labor flexibility. Consistent fit-up means consistent welds, and a wider range of operators or a robot can run the job.
The rule we use: if a weldment is high volume, distortion-prone, or has tight dimensional requirements, a dedicated fixture usually pays back quickly. For one-off and short-run fabrication, manual jigs and a modular table are almost always the smarter spend. When you are between the two, a modular welding table is the low-risk middle path.
If you are weighing a custom welding fixture for a production weldment, our team designs and builds welding jigs and fixtures and will tell you honestly when standard tooling is the better call. You can send us your part files and assembly drawings for a quote.
Perguntas mais frequentes
What is the difference between a welding jig and a welding fixture? A welding jig positions and aligns the parts and sets the geometry, while a welding fixture holds and clamps them rigidly during welding. Most welding tooling does both jobs, which is why the terms are used interchangeably in shops.
Why do welding fixtures matter so much? Welding heat makes metal expand and then contract as it cools, which pulls assemblies out of shape. A welding fixture restrains the parts, manages heat, and compensates for shrinkage so the finished weldment stays straight and within tolerance.
What are the main types of welding fixtures? Common types include clamping and holding fixtures, fit-up and tack fixtures, welding positioners, rotators or turning rolls, manipulators, turntables, modular welding tables, manual jigs such as corner clamps and magnetic squares, and dedicated robotic welding fixtures.
Where should clamps be placed on a welding fixture? Clamps should hold the part on cool, solid areas away from the weld zone. Clamping too close to the joint traps heat, causes local distortion, and exposes the clamp to spatter.
What materials are welding fixtures made from? Welding fixtures are mostly heavy steel for rigidity. Copper or brass backing and chill bars are used at the joint because molten steel will not fuse to them, and they draw heat away to limit distortion.
How do welding fixtures reduce distortion? They restrain the parts against contraction forces, use chill bars to pull heat from the joint, allow a balanced weld sequence, and are sometimes designed to pre-set the parts so they spring back to true after cooling.
Should I buy a standard welding fixture or have one custom built? For one-off and small-batch work, manual jigs and a modular welding table are usually best. For high-volume, distortion-prone, or tight-tolerance weldments, a custom dedicated fixture reduces scrap and cycle time enough to justify its cost.
Getting Welding Fixtures Right on Your Weldments
A welding fixture is judged by one thing: does the assembly come off the table the right shape, every time. Get there by controlling heat, restraining contraction, clamping away from the joint, leaving the welds accessible, and building the tooling heavy and rigid. Match the fixture type to your volume and your welding method, and choose between manual jigs, modular tables, and dedicated fixtures based on how the cost pays back across the run.
If a weldment keeps coming out of tolerance or eating labor in rework, that is the signal a purpose-built fixture will earn its keep. Send us your assembly drawings for a quote and our engineering team will recommend the tooling approach that fits your volume, your welding process, and your accuracy targets.